Showing posts with label Sewing. Show all posts

Sunday, March 29, 2015

Completed: Cordova Jacket from Sewaholic Patterns

I've had this pattern i stash for almost 2 years and never been completely sure that it was for me. So I never touched it. But it has been on my conscience since I HATE buying things and not using them -  it's simply not in line with my style of life. Now I wish I had sewed it sooner because it is AWESOME!! What a cute, light, summery yet stylish jacket this is! Work approved too!

I sewed it in a medium weight linnen (it is light red, NOT pink!!!), added a gold metal zipper and lined it with a bright, happy turquoise fabric. The only adjustments were a small FBA and that I had to reposition the sleeves somewhat. The puffed part were sort of hanging off the shoulders and needed to be moved in a bit. I also moved the sleeves slightly forward to be able to move my arms more freely.

I really recommend this pattern!

/Alexandra

PS. The shirt underneath is another Granville shirt that I'll write about some day soon.


Thursday, March 12, 2015

Completed: a doll for my 2y old

In my parenting philosophy I feel strongly that I don't want to limit my children by forcing them into a shape decided by society, but I want them to be who they really are and pursue interests of their own choices. To do that, I want to offer them everything, not "dolls for girls and cars for boys".

I also try to be a little more protective with the kids in terms of chemicals and substances that may interfere with their hormones, which has lead us to remove a lot of suspicious materials from our house, such as most plastics. This makes the toy department quite limited. Have you been into a regular toy store lately? Try to find 5 things not made from plastic. Oh, and good luck with that by the way...

Anyway. We have managed to sniff out toys made of wood and metal for most things, but we hadn't "solved" the doll thing. And then it hit me, why not SEW a doll!!! I men, duh?!?!? I can't believe it took me so long to crack that one! Said and done. I spent an hour on Pinterest and pinned all the waldorf doll sewing tutorials i could find and off I went!

May I introduce..... - The first homemade doll of my life!!!!

She is made from organic cotton jersey, stuffed with wool. The hair is croched from mohair yarn, and then dyed with tea to make it more off white (than white). Ain't she cute?

A little belly button and cute little toes!

A little bottom to sit on ;-)
I then made some clothes from vintage fabric scraps I had around the house:


And then I sewed a matching tunic for my daughter...


Now, let's hope she likes it!!! We'll see this weekend.

/Alexandra

Wednesday, February 18, 2015

Completed: Plantain T-shirt from Deer and Doe

So, I've been sewing again :-)

As a part of my spring SWAP I wanted to sew a color blocked top to go into the work closet. I have read a lot of great reviews of the free pattern from Deer and Doe: Plantain Tee. I have to say I was a little suspicious of the A-line shape, because it is REALLY a-line. I have a fairly narrow waist and sometimes a-line tops look a little too shapeless on me. (I LOVE a-line dresses though).

I did my usual FBA, of course, and then I gathered scraps of fabric I had laying around and started constructing the tee. I did plan to add those elbow patches, because I love elbow patches, but with the color blocking I thought the top became busy enough without them, so they were left out in the end.

This is the finished top. If I would sew it again I would for sure make it less flared, but I still really like the result. In particular the color combo!


Saturday, February 14, 2015

Completed: Sewaholic Granville Shirt, + Pattern Review

I was thrilled when Sewaholic released the new shirt pattern, with all the neat details you'd find in RTW. I have wanted to sew myself a perfect shirt for a while but didn't want to invent my own pattern. The shirt was quickly out on all sewing blogs too with nothing but amazing reviews.

The only alteration I made on forehand to the pattern was my usual FBA. Other than that I cut a straight 8. Other alterations that I did during the process in the pattern review below.

Finished shirt!!

and back!

And here is my pattern review: 

I'll start with the things I liked: All in all a very well drafted pattern with a lot of attention to details. I love the clever collar stand construction and the beautiful sleeve plackets. I also love the back princess seems and the self lined yoke - it all made for a very professional finish. Another good thing (personal preference) were the slim fit sleeves, which makes the shirt look very tailored in my opinion.

Just look at those collar points!!!! SHARP.

I added a placket button to keep the fabric in place, since I had to overlap quite a bit.


There were, however, things I didn't like as much with the pattern too. The suuuuuper long sleeves, for example. Many blogs mention it, but they are seriously long. Chimp long. I need to shorten them at least one inch next time, maybe more.

Also the cuffs where enormous. The sleeves are not eased or tucked into the cuff, but the cuff matches the circumference of the sleeve exactly. This means the cuffs fall over my hands completely if I don't overlap A LOT. Next time: make the cuffs at least 1,5 inch narrower and ease/tuck in the sleeves instead.

The pattern, like all Sewaholic patterns, are made for pear shaped bodies. I do have a narrow waist and big hips, but apparently I wear my extra load somewhere else than at the sides because the original shaping gave me wings! It actually looked kind of ridiculous so I had to unpick the flat felled seams and reshape it. I graded from size 8 down to a size 0 at the hemline and it still has plenty of shape and room. Well, I guess we are all different ;-)

Showing the long sleeves and the side wings :)

After grading to size 0 at the hemline.
By the way - look at that smooth hemming job! I am seriously proud!


Another thing that threw me off was that I had to cut back the collar 3cm (more than 1 inch) to get it to fit! Which means that I must have fucked up somewhere (or else it should have been mentioned in all those blog posts, right?!?). I double, and triple, checked everything but could not find where it had gone wrong... Thankfully the shorter collar would still fit around my neck (better actually!) and no weird wrinkles appeared either. I am still puzzled.

All in all, this is a lovely pattern. With my new learnings, this will be great next time. I know this pattern will become a staple and I already want to make my next Granville! Thank you Sewaholic  the best pattern yet!


Monday, January 5, 2015

Completed: Glam top + tutorial on pretty details on the inside

So my first top from my spring plan is completed. I actually had already started it before the plan was fully set, but hey. I wanted it to stick out a little in terms of details in comparison to other tees I just knock out in an hour or so. This baby is really worked on, and it think it was worth it.

First I will take you through the tutorial for pretty insides. You know when you buy a top you never see any raw/serged edges when it's on the hanger - ever. Not even for cheapo brands. So why should we settle for anything less when making clothes ourselves?

This is what I did:

1. Cut a piece of contrasting (if you want) fabric with similar amount of stretch as the main fabric, Let the top follow the shape of the neckline on the back piece and the lower part should be a nice rounded shape, slightly below the front piece neckline. If you have trouble shaping the lower part, then trace off a plate or similar. It is important that the shape is even since it will be a sewing guide later on.


2. Serge the lower edge of the contrasting fabric. If you have a name tag, then sew it to the piece as well, about 1'' (2,5cm) below the edge, centre front (only through the inner piece). Pin it to the inside of the back piece, wrong sides together. Sew along the served edge with a long straight stitch. Note - here you must be careful since this line will be seen from the outside. If you are not happy - unpick it and resew it, trust me, it will drive you crazy if this seam is wonky! Join the shoulder seams.


3. Time for the neck line and all the schnazzy trims! Cut a strip, around 4cm wide, and hold it against the shape of the neckline. Stretch A LOT as you go around, to get the right size and to avoid having a neckline that doesn't stay flat later on. When you are all the way around, cut the strip off and join the short edges (right sides together). Fold in half, press and pin.
Pin it to the neckline, stretch more at the front than at the back of the top. NO SEWING YET!

4. Cut another trim, about 1'' wide, choose a fun print if you want - it will not be seen on the outside. Pin it to the back of the neckline so that you sandwich the folded trim in between the new strip and the back piece. Stretch slightly. To clarify: the new strip shall be placed face down on top of the folded trim on the inside of the back piece. Leave about 1cm past the shoulder seams and cut of the rest.


5. Now serge all the way around through all the layers! When you are done it should look like this:
From the inside of the top
From the outside (right side) of the top. The back side that is.
6. Now comes the real fiddely part! The strip shall be folded under the served edge on the inside to encase it completely. This is done in two steps.
First, understitch the trim to the seam allowance only, close to the edge, with a straight stitch.

Then fold under the raw edge and pin. Topstitch the other end of the trim to encase the serged edge. This is where things can go pear shaped! This second line is seen from the outside and it is important that it is on an even distance from the first line or it will look shitty!! I had to redo this step 3 times before I was happy.
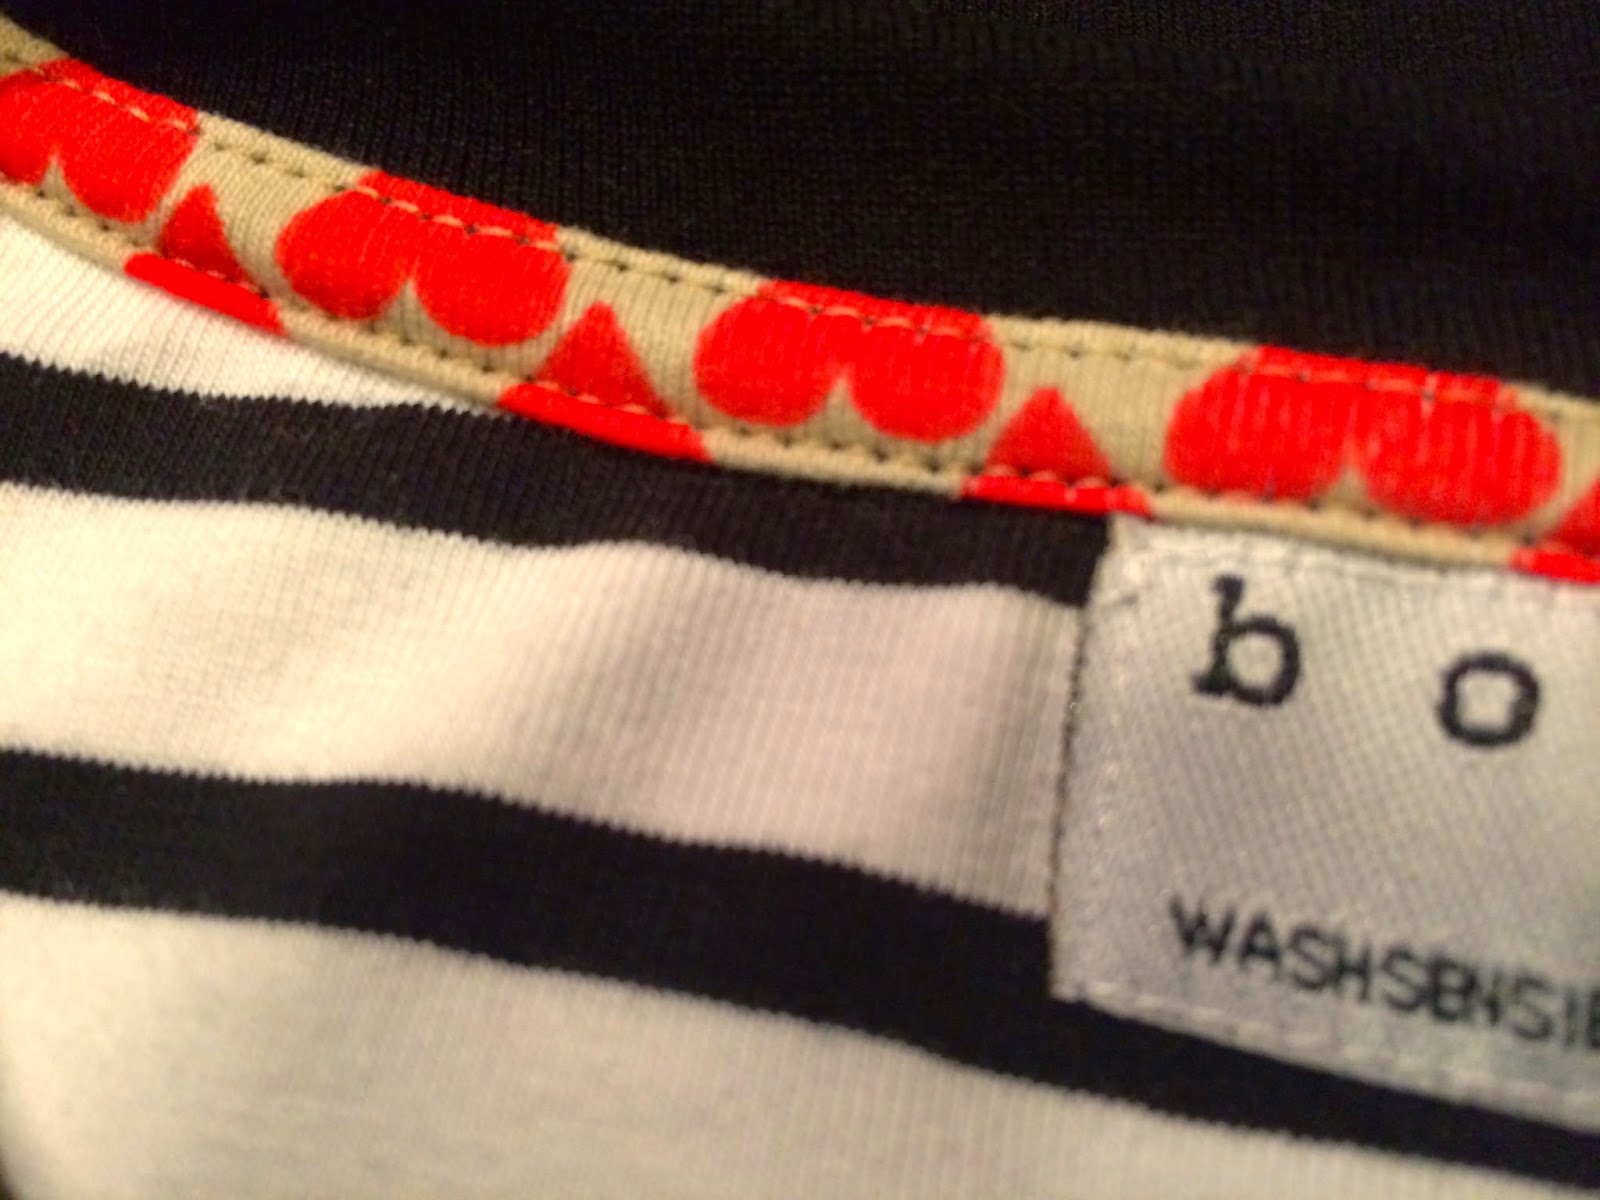

Done!!! Ain't that pretty???

7. The last step is to topstitch the seam allowance on the front side. Only go between the shoulder seems. Do this with an elastic straight stitch or with a cover locker. After this you can proceed as normal with setting the sleeves and sewing sides and hems.


Apart from this I actually made some other fun things too. I decided to up cycle some "gold" sparkles from a hideous second hand blouse I had in a bag. I sewed this at the center back, actually before step 3 above.


I also wanted rolled up sleeves. I cut the sleeves extra long, rolled them up and then hand stitched all around from the inside through all the layers except the top one, to keep the rolls securely in place with no visible stitches.

Final product (sorry for poor picture quality - It is difficult to take pictures without help, especially for black items):


Well, again, I won't be receiving prices for best photography anytime soon, but trust me that this garment looks WAY better IRL than shown here :)

/Alexandra

Planning sewing projects for the coming season!

New year, new sewing projects!! This year will be devoted to details! I will not settle for anything less than perfect, and I'll go for all the bits and bobs that you'll ever find in the RTW garments to make them look finished and polished. That's my new years sewing resolution :) What's yours?

This is my plan for spring:


Saturday, December 27, 2014

Sew for a Change - wrapping up the year!


One year has past and what a year it's been!! Mindful shopping, a lot of sewing, and many new learnings on how to lead a greener life and I am so glad I did it! Some things have been very challenging and others came easier, but I think a lot of the things I've tried will stick with me for good.

Should I start by sharing my final score? You know we started out with 75 points for the year and then there were more points to earn if a challenge was completed successfully. I didn't pass them all, but I gave all of them a go. After a splurge (synthetic pantyhose are a killer!) at the end of the year I ended up on 13 points - woohoooo, I made it!


The best part of this whole experience was that I have challenged myself to sewing a lot more, and more advance things (such as jackets, coats and bras). Another cool thing has been the impact on the whole family, who I found to be equally into it all as I have been. I have also re-discovered many second hand/vintage clothing stores where I've scored very nice things. I will definitely continue to search for things in the second hand market more often than I did before. I have also learned that I don't need a lot of things at all (I kind of already knew, but it has been nice to be able to test myself on that), and may I just say that this has been a year when I have

  1. dropped several dress sizes since being pregnant
  2. started a new job with a fancy dress code
- and STILL I have managed just fine!! Actually kind of proud that I have dared to wear my home sewn things to work and also that I dared to remake/resize a lot of clothing by myself.

In 2015 I will not be tracking any points, but I'll continue to make conscious decisions for sure. My guess is that I would consume about the same amount of points for the next year too. I can live with that.

I have really enjoyed all the inspiring comments and sharing of experiences, both on the blog and in the Facebook group. I'll treasure this experience for a long time. I wish all of you a wonderful new year and thank you so much for hanging out here with me!

xoxoxox
Alexandra


Monday, December 1, 2014

Completed: another batch of lingerie!

Since my first, rather successful, bra sewing adventure I have now altered the "pin-up girls classic bra" pattern to add more room in the cups. We'll, I did get help with the alterations from the sweet woman running the webshop www.bwear.se

This one is wearable, although still a tad tight.


After that I thought I'd try the popular indie pattern Marlborough Bra, from Orange Lingerie. Malin told me her first one ran small so I went for my normal bra  size 34DD (75E) instead of going for the measures recommendation (which was 34 D). It turned out to be pretty much perfect! Just look at this!

High from this success I thought I'd treat myself to a matching set (first one in absolute ages) and went for the free pattern Rose Hip knickers that were getting great reviews. And hold your horses - they turned out great TOO!!!

I am a wee bit sad that I couldn't find the exalt colour green of the lace trims to match the bra, but I still think it works.

So, from not having sewn any lingerie in my life (except the odd pair of knickers from left over kids print jersey) I have this month sewn no less than 3!!! bras and one panty. I think I have indeed learned a new skill!! 

Thursday, November 27, 2014

Completed: the first piece of men's wear!

I have FINALLY sewn something for my loving husband! It's a Xmas gift, so he doesn't know yet. Posting it online before Xmas? Ruining the surprise? Hardly. This is totally safe. Unless I start writing about the stock market or about electronic gadgets, he will not be a frequent visitor, trust me.

This is what I made: a t-shirt with a contrasting pocket in a lovely, thin, wool knit jersey. Pattern: Julian Tee from Jenny Hellstrom Ruas


Tuesday, November 25, 2014

Completed: Various bits and bobs

Hey, I've been sewing, friends! Far more than I've been sharing lately.

I thought I'd put up a post with some of the things that I've completed that I am very pleased with, for you to enjoy and hopefully get inspired by.

Here we go! The photo quality is impeccable (not), but I am no photographer, ha.

First one out is a 3/4-length, boat neck, basic, striped top. This is my all-time favourite type of top and I never get sick of stripes. I made this one by copying a top I had in my closet, only changing the neckline. I actually made two, one with blue stripes and one with black stripes. You can hardly tell them apart, therefore only pics of one.


In the below picture I am wearing a royal blue "Wardrobe Basic" jacket. The picture is not great, but the jacket actually is. You have to take my word for it ;-P Pattern from Ottobre.


The third item is the first LBD that I have owned in a decade!! I have had it in the plan to sew one for over a year, but for some reason I just cannot make myself make things in black - because black fabric is BOOOOORING. I do love this dress though, now that it's made, so I am pleased I fought my black fabric resistance this time. Pattern from Stoff & Stil.

Oh, I now we get to the REALLY lousy picture!! It is almost impossible to see what it actually looks like, but it's all right. Pattern from Burda Style.

The last one out is a gem! The coolest and comfiest skirt on the planet is here! Self drafted pattern (or it's so simple I don't even wanna call it a pattern actually). It is made in the loveliest merino wool knit. I want to live the rest of my life in this skirt. Just because of this big love, I'll give you no less than THREE pictures of this little darling.


See you soon!

/Alexandra